Skip to Content Skip to Navigation

Create a Local Contact Group

Printable Version

Purpose: Provide instructions on creating a contact group in Outlook.
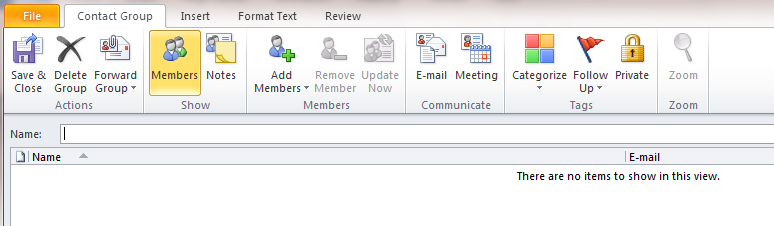
In Outlook:

  1. Click on Address book

    Image of the top part of Outlook. Address Book is highlighted
  2. Click file and select New Entry
  3. Select New Contact Group
  4. Type in the name for the contact group
  5. On the Contact Group Ribbon click Add Members

    Top of Outlook under Contact Group tab Members is selected.
  6. Select add members from Address Book
  7. Find the desired member and click the Members button in the lower left corner
  8. When all members are selected click OK
  9. On the Contact Group Ribbon click Save & Close
  10. Note that the contact Group can be sent to others by selecting the Forward Group button on the Contact Group Ribbon
Gulf Coast State College does not discriminate against any person in its programs, activities, policies or procedures on the basis of race, ethnicity, color, national origin, marital status, religion, age, gender, sex, pregnancy, sexual orientation, gender identity, genetic information, disability, or veteran status. All questions or inquiries regarding compliance with laws relating to non-discrimination and all complaints regarding sexual misconduct or discrimination, may be directed to Lee Wood, Executive Director, Human Resources/Title II/504/Title IX Coordinator and Employment Equity Officer, Gulf Coast State College, 5230 W. US Highway 98, Panama City, FL 32401.